DIY Portrait Photography Posing Table

Hey all! I wanted to do a quick write up and detail out how I made my DIY posing table. I went for a roughed up/rustic look so feel free to skip those steps if that isn’t your style. For this project I went to Home Depot and took advantage of their offer to cut all the lumber you purchase. They mention on their website that they’ll make 1-2 cuts for free, however they didn’t charge me for any of the cuts I had them make. So BIG WIN! I planned this all out so I could get the most out of three pieces of lumber. Below is a supply list that you’ll need. Keep in mind, I had the power tools already but this can absolutely be achieved with a handsaw (if you don’t have access to a Home Depot) and sand paper.
SUPPLIES:
1 - 2”x6”x10’ board - $7.58
1 - 2”x8”x10’ board - $7.82
1 - 2”x4”x12’ board (I went with 12 feet because I couldn’t find the 10ft…Use the leftover) - $4.54
1 - box of 2 1/2 inch deck screws
1 - Quart of stain of your choice (make sure to apply the stain in a well ventilated room)
1 - rag and foam brush for the stain
1 - safety glasses
1 - latex gloves for staining
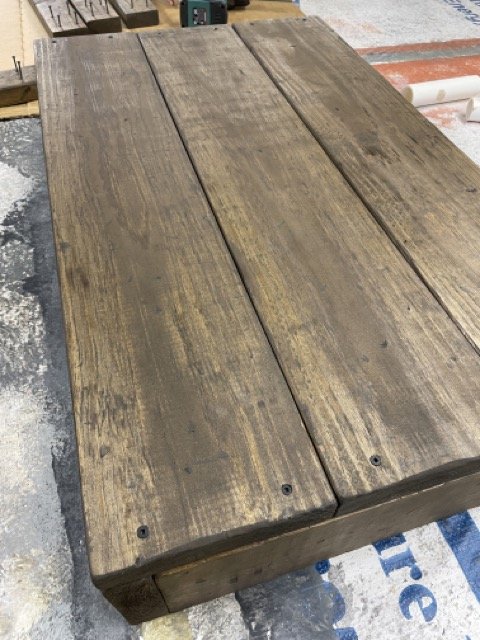
The table top I made out of the 2x8 boards cut into 3 pieces (36” each) and then I wrapped the sides with the 2x6” boards. Finally, I used the 2x4ft boards of the legs cut to 30 inches.
I tried to make this project quick and easy. So for the distressing process I hit the boards with a hammer and wrench. There was no pattern to it….just go crazy. I also used the sander to round off the edges and make the boards look more rugged and less cookie cutter.
Once I had all of the boards distressed I stained them with a dark walnut stain, feel free to use any color you’d like. I propped up with the boards with scraps of pic pipe so I could stain the entire board (again, I wanted this project to be quick).
I let the stain dry for about 24 hours before assembling the table. You’ll notice in the one photo that I labeled each leg with a number that corresponds to the same number on the table. That way I can take the legs off and remember where the legs go back. I didn’t measure any of the drilled holes to speed things up so I’d be guessing without those.
I hope this all helps. I’m always happy to answer any questions. But, again, I can’t stress enough how easy going I wanted this project to be. I don’t consider myself a wood worker so please don’t judge. Remember to have fun with this and be safe.
Much Love, all!
- Ethan Alex